Showing posts with label feather stencil. Show all posts

Monday, 29 October 2018

Mixed Media Layout Video Tutorial

Hola crafters,

This is Jaishree this side and I am here with yet another mixed media project for you all. Today I will be sharing with you, a video tutorial, on how to make this vibrant and colorful mixed media layout. I used the amazing IMMIX Art essentials for mixed media. 


I loved using the IMMIX products as they are of the best quality a mixed media artist can dream of. You should definitely try them if you haven't already. 

And now on to the project! Here's is the process step by step video tutorial for this colorful and vibrant layout. 
Let's dig in!  


Supply list - 


Monday, 18 June 2018

Just For You by Steph

Hi everyone, Steph here today combining the Feather stencil with the Leafy Flora chipboard element.  


I used a piece of stenciled cardstock that was left over from another project I recently created.  To get the negative image, I spritzed the inked stencil placed it ink side down on white cardstock.  Then I  used a brayer to release the ink onto the white cardstock. 


The panel was cut to fit the card, inked with yellow and brown inks then matted with off-white cardstock.  Next, I wrapped the panel with twine then adhered the panel to a brown card.


The Leafy Flora embellishment was inked with assorted colors of Brilliance inks.


The Flora embellishment was added to ovals and then placed on the card with foam adhesives.  Gems were added to the flower centers and the sentiment was stamped, matted and placed on top of the ovals, slightly behind the embellishment.


Thanks for stopping by.

Look forward to your entries to our monthly challenge and the theme this month is Anything goes.

Thanks for joining.

Please stop by my blog for more inspiration.

Steph

Friday, 6 April 2018

Mix Media - sending you love

Hello, Friends

Welcome April, wishing you a wonderful month filled with love and happiness. 

Dheepika here and I'm back with Mix Media project.


A step at a time:
  • Take an white panel measures 6" x 2 1/2 " and apply gesso (dry with the help of heat tool).
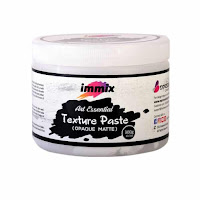
  • Place the stencil on the white panel and apply texture paste on it and let it dry.
  • Spray the colors on the white panel and dry with the help of heat tool.
  • Die cut the flowers, spray the colors on it, dry them and add pearl at the center.
  • Add some golden threads on left side top and place the flowers above the threads.
  • Stamp the sentiment on the black card stock and heat emboss it and paste it on the white panel.
  • Now paste the white panel on the black base 6 1/4 " x 2 3/4". 
  • And the project is ready.
Here are a few photographs of the project including close ups


Supplies list:


Thank you for visiting our blog again,
 
Don't forget to be awesome!
Dheepika vasudevan 

Tuesday, 20 March 2018

Thank You with Feather Stencil

Hi everyone, Steph here today with my first post for Expressions Craft.


I used the Feather Stencil to create the background for my cards along with the Happy Birthday stamp.


Here's my video of the process.


Here is the link to buy


Enjoy.  Please stop by my blog for more inspiration.

Steph

Thursday, 8 March 2018

Mixed media Card

HAPPY WOMEN'S DAY TO ALL THE BEAUTIFUL SOULS IN THE WORLD. 

 I’m Dheepika Vasudhevan here with my first post for  Expressions craft.

MIX MEDIA CARD


A step at a time:
  • I have started with die cutting the rectangle piece and applied gesso on it and dried (with the help heat tool).
  • Place the Feather Border stencil at the center of the rectangle die cut and create a texture on it.
  • Paste the angel on the rectangle die cut and spray colours on it (pink at the center and yellow on both the ends).
  • I have highlighted the textured area with black acrylic paint.
  • After that add gold metallic colour to the angel.
  • Once the rectangle die cut is dried.I have glued the rectangle die cut on the black card stock which is slightly bigger than the rectangle die cut. Repeated this for the yellow card stock also.
  • Then paste the layered pieces on the card measures 4 1/4" x 5 1/2".
  • Now the card is ready.
Here are a few photographs of the cards including close ups


My Second Project is a Mini Canvas


A step at a time:
  • I have started painting the mini canvas with yellow colour ,orange colour and red colour in circular movement.
  • Then paint the chip board ( Buddha small ) in black colour and paste it on the mini canvas.
  • Now the cute mini canvas is ready.
Here are a few photographs of the cards including close ups


Supplies list:


Thank you for visiting our blog again,
Don't forget to be awesome!

Dheepika Vasudhevan.