Wednesday 30 January 2019

Mixed Media Art

Hello Friends,

I'm Priya Mishra with you today with a Mixed Media Art.

I have used the brilliant metallic Paints from Expressions Craft. These paints are so amazing and the shimmer is awesome...


Now let's move on to the tutorial.
First I took these two bases and gave a coat of Heavy white gesso and crackle paste all over.


Then I glued some big round bottle caps here and there.


 Now, I cut some chipboards in small pieces and wrapped some with rope and stuck on my canvas.


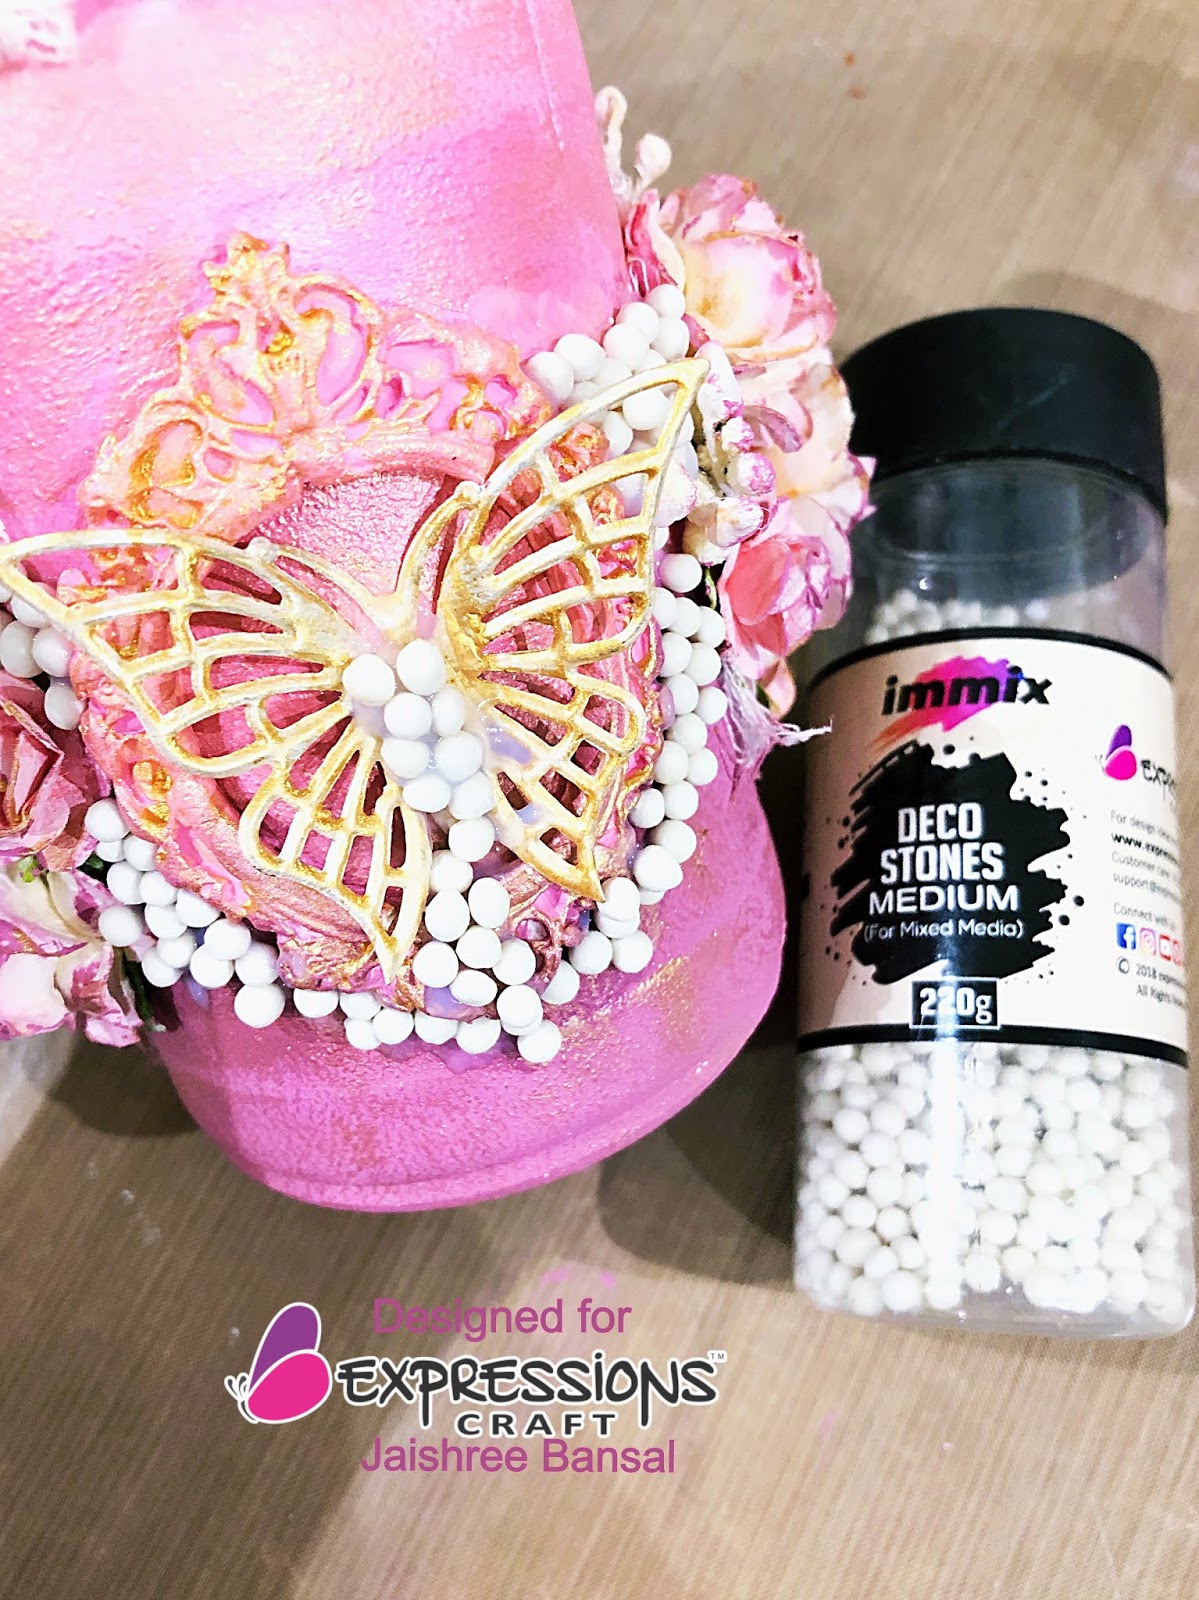
Then I added some Decostones here and there to create some texture around my piece and covered it with white gesso.


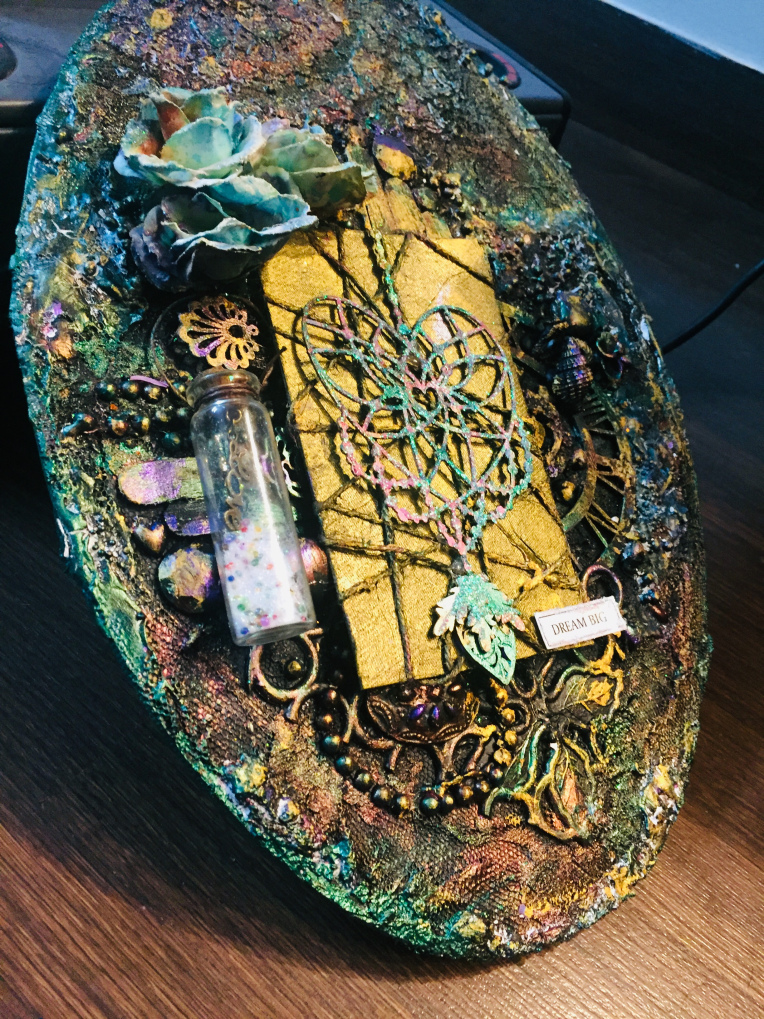
Then I took a paint brush and glued some steampunk gears on it. I also covered it white gesso and started coloring with metallic paints Velvet Orchid, Jungle green and Holiday Gold.


For the base panel, I added a few negative of chipboards and covered them with texture paste.


And the final piece looks like this.


Hope you like my project. Do not forget to enter our challenge and win some awesome prizes and a chance to Guest Design for our blog.

Hugs,

Supplies Used


Sunday 27 January 2019

Guest designer - Vintage Frame

Hello everyone,

Today we have our guest designer Anita goel, she was the winner of our November month challenge.

Participate in our monthly challenge to become a Guest designer.

Over to her

Hi friends.. As a guest designer post for expression craft .. I altered Mdf oval frame as table decor, using chippies and wonderful Immix metallic paints..

Glimpse r here::::


Let’s start with tutorial::

Stick net on oval frame.
Mix Immix sprinkle glitz with texture paste . And apply it with palette knife on top.
Added Embellishment from my stack like beads ,lace,pearls, stones,clock frame,shells.
Now I applied Crackle texture paste from expression craft and stick decostones micro and mini on the top.
Cover everything with black gesso.
Now fun part starts..Randomly dry brush the metallic paints ( velvet orchid and Pearly peacock)from expression craft .

Take cardboard tag ,, and tie rope on it .. colour it with metallic paint( raw umber).
Highlight dream chippies from expression craft with metallic paints..
To give it glitter ,sprinkle fairy dust ( green) from expression craft.
Fill same fairy dust In wish bottle with Love charm inside…lastly .colour the flowers with same colour of background and stick to side of tag.. 
Hope u love this tutorial..
Happy crafting❣️

Anita Goel

Saturday 26 January 2019

Vintage diary

Hi friends Priya Gajjar here for Expressions Craft.  Today sharing a vdo tutorial how I created this vintage diary .
The process is very easy for new comers also to follow .and with Expressions  Crafts amazing products,  u get awesome results for ur projects too.


Stencils
https://www.expressionscraft.in/product/best-stencils/

Metallic paints

https://www.expressionscraft.in/product/raw-umber/

https://www.expressionscraft.in/product/tuscan-red/

https://www.expressionscraft.in/product/gun-metal-grey/

https://www.expressionscraft.in/product/gun-metal-grey/
Other products used
https://www.expressionscraft.in/product/immix-deco-stones-medium/

https://www.expressionscraft.in/product/black-heavy-gesso/

https://www.expressionscraft.in/product/texture-paste/

Chippies
https://www.expressionscraft.in/product/cogs-wheel-frame/

Thursday 24 January 2019

Cherish your Antiques - Altered goggle case

Hi Crafters!!!

Today I am presenting before you an altered goggle case. This is my project for Expressions Craft. I took an ordinary goggle case and transformed it into a unique and beautifully designed goggle case.
To create your own please follow the steps mentioned below.


Here is my project:

Step 1. Take an old goggle case and apply black heavy gesso over it and let it dry naturally.


Step 2. I created the texture over the case with the help of mini stencil and texture paste and again covered the texture with black gesso.


Step 3. I colored the case with metallic paints.


Step 4. I added a layer of deco stones over base and colored them with metallic paint.


Step 5. I placed all embellishments like chipboards, cheese cloth, sea shells, metal embellishments etc.


Step 6. I used Sprinkle mist color sprays to provide a beautiful and colorful effect and finished the project by highlighting it with Mari gold metallic paint.


Supplies Used


I hope I have inspired you to altered something. Don't forget to enter in our current month challenge and win exiting prizes. 

Love & hugs
Varsha

Wednesday 23 January 2019

Shabby Chic Altered Glass Jar

Hello beautiful crafters,

This is DT member Jaishree here with a picture tutorial for you all on how to alter a glass jar in a shabby chic style. this jar can be used as a flower vase, a brush holder, pen holder, possibilities are endless. 


Lets get started!

Step 1 - Cover the jar with heavy gesso white. 


Step 2 - Use apply chalk paints of your choice (I used 2 shades of pink, one dark one light) I went in for a dual tone effect. I also adhered my clay frames before painting. 


Step 3 - Since I wanted to give it an ombré effect, I applied IMMIX metallic paint in the color pinky toes in the centre to merge the shades going from dark to light upwards. 


Step 4 - I took some flowers from my stash and covered them with white gesso. 


Step 5 - Once dried, I arranged the flowers and adhered them on the jar on opposite sides. I also added a white lace on the rim of the jar. 


Step 6 - I used a couple of metal butterflies and covered them with white gesso first and then colored them using IMMIX metallic paint holiday gold. 


Step 7 - I dry brushed the IMMIX metallic paint holiday gold on the clay frames as well as on the visible areas of jar over the calk paints. 


Step 8 - I finally adhered the butterflies and added some deco stones around to fill in some empty spaces. 


Here is a finished look - 


 Hope you liked the project and are inspired to up-cycle one of your own old glass jar as well. 

Until next time
Happy crafting


--

Supply list -