Showing posts with label wedding wishes. Show all posts

Monday, 21 May 2018

card - floral

Hello, Friends

Dheepika here and I'm back with floral cards today.
I have used cardstocks, stamps and stencils for today's project.


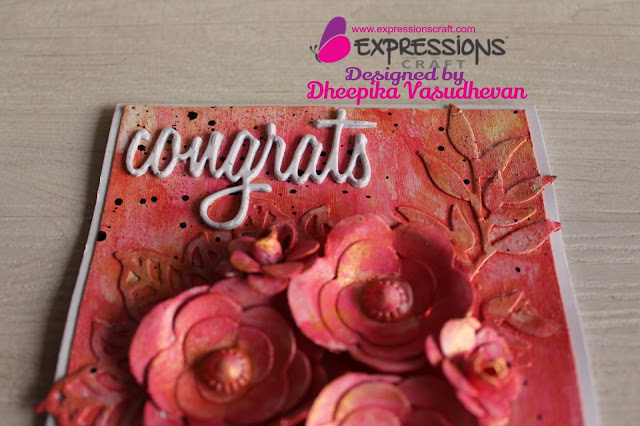
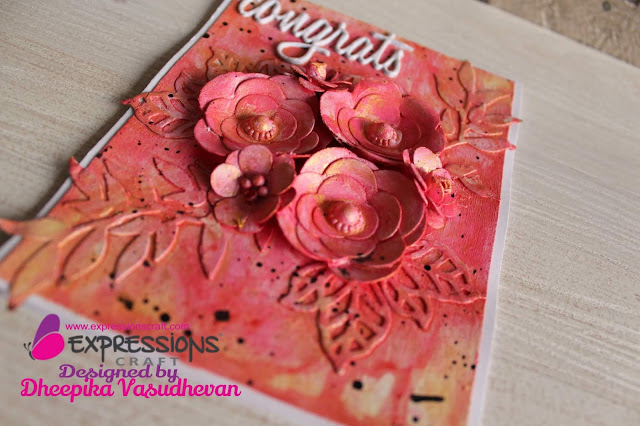
Card 1 - Congrats


Video tutorial:-


A step at a time:

  • Take a cardstock apply gesso on it and dry with the help of heat tool.
  • Once the handmade flowers ( used Expressions cardstock) are done apply gesso on them and let it dry.
  • Arrange the flowers on the cardstock.
  • Started spraying colors on the card and until I'm happy I added colors on it. Dry the colors.
  • Spray some golden shimmer on it and add some metallic colors.
  • Splatter some black color on it.
  • Add the sentiment congrats on the left top.
  • Now the mix media floral card is ready. 


Here are a few photographs of the project including close ups


Card 2 - Best Wishes


Flower making tutorial:-


A step at a time:
  • Stareted with die cutting the flowers and leaves.
  • Once the flowers are made.
  • Add the black cardstock to the base card.
  • Then arrange the handmade flowers and leaves on the cardstock. Add foam to the flowers and attach them to the cardstock.
  • Stamp the sentiment and add it on the card with foam tape at the backside.
  • Now the card is ready.


Here are a few photographs of the project including close ups


Card 3 - Just For You


A step at a time:
  • Started stamping the flower on a white cardstock and colour the flowers.
  • Die cut a circle, place the stencil and apply gesso on it.
  • Added sand on the stenciled area and sprayed color on it.
  • Again die cut in oval shape on the circle die cut to create some space to insert all the flowers.
  • On the the card base splatter some black color and paste the circle die cut with foam tape at back side.
  • Now the card is ready.


Here are a few photographs of the project including close ups


Thank you for visiting our blog again,


Don't forget to be awesome!
Dheepika vasudhevan.

Wednesday, 9 May 2018

Best Wishes by Steph

Hi everyone, Steph here today with the Wedding Wishes stamp set.  As we approach the wedding season, I like to get my cards ready in advance and this stamp set is perfect for creating a number of cards.


I wanted a gray and white card so I began by stamping the wedding couple in gray  ink on white cardstock.  Using Copic Markers, I lightly colored the couple adding pops of pink for color.


The image was then die cut.  Where the dress extended beyond the die, I cut around it so as not to cut it off.  The image was then matted with gray cardstock.


My card consists of some lovely papers that I adhered to a gray base before adhering to my card.  The sentiment is also from this stamp set and I simply matted it and added to the card with foam adhesives for dimension.

This is a wonderful stamp set that I will using for many upcoming weddings this year.


Supplies List
Wedding Wishes
 
 Please stop by my blog for more inspiration.


Thanks for stopping by.

Steph

Monday, 7 May 2018

wedding wishes

Happy Monday friends,

I am shylaa here today sharing my inspiration using Wedding Wishes Stamp.

I have made a Easel box cards with a drawer.


Steps involved:
  1. First stamp the image and watercolour it and keep it aside.
  2.  Make the easel card with drawer. 
  3. Created the shaker element using designer chipboard embellishment
  4. Then decorated with flowers,diecuts

Some close up clicks


Shaker element inside chipboard frame


Hope you like it

Supplies used


Thanks for visiting

Happy Crafting

Tuesday, 24 April 2018

Dancing Couple using Wedding Wishes Couple Stamp

Hello craftizens..

Kirti here. 
I am back with some fun interactive element for Couple Scrapbook. 


Usually we think that only baby scrapbook should have fun interactive elements. But think out of the box and try something fun. Imagine the time when you got married, weren’t you happy and dancing. With this thought in mind, I have made this woogly-woogly wooosh wobble embellishment using wedding wishes couple stamp by expressions craft.


This couple is too cute to have some fun with..


The wobble action gives the feel like groom is dancing carrying the bride!!

ISNT IT!!


so friends, let your creativity dance with this cute stamps Wedding wishes by Expressions Craft.

to shop for supplies, follow the link


THANKS,
KIRTI

Friday, 13 April 2018

Card - our love life begins

Hello, Friends

welcome April, wishing you a wonderful month filled with love and happiness. 

Dheepika here and I'm back card.


A step at a time:

  • Take an acetate sheet measures  4 1/4" x 5 1/2" as a base card.
  • Add the sentiment at the left side bottom and heat emboss it.
  • On the base card creates a shaker, paste the two layers of the craft foam (die cut the rectangle shape and create a window in craft foam) and add sequins of different colors.
  • Paste the acetate on the top of the craft foam and add the thin rectangle die cut piece on the acetate and also on the back side of the card to hide the glue areas.
  • On the inner side take a white die cut stamp the image and color it. then add a black die cut slightly bigger than the white card stock and paste it inside the card add black card stock at the back side of the base card to hide the glued areas.
  • Now the card is ready.
check the video


Here are a few photographs of the project including close ups


Supplies list:

Wedding Wishes 
Thank you for visiting our blog again,

Don't forget to be awesome!

Dheepika vasudhevan.