Thursday 28 February 2019

Baby Zodiac _ Mixed Media Layout

Hola, 

Manasa Priya back at the Expressions Craft studio with a tutorial on how to Acrylicmake your own baby photo layout.

This particular project can be used as your scrapbook page or can be framed as is.  I plan to frame it up my LO's layout ☺

So,  for this project I picked a white Cardstock from Expressions Craft as a base
The newly launched fabric pack was using for layering,  here I used a burlap sheet to keep my composition very earthy.

And I particularly highlighted the birth date in glitter,  used the premium glitter Alaskan Gold for the same.

Stamped with sentiments pertaining to the baby's Zodiac - Cancer
And all the characteristics pertaining to the sign to add interest along with some script to add to the background.
So here is my quick layout using the chalk paint azure and sprinkle mist deep teal.   I used the heavy gel medium to add textures
Used the art medium to stick all the elements in place.

I hope you liked it. Here is the detailed video tutorial for you guys ☺


Also,  listing out all the supplies used in creating this layout
Fabric Pack

Until next time..  ❤

Wednesday 27 February 2019

Mixed Media Live Class

Hi friends,

Welcome to Expressions craft Studio.

Venetian Mask Mixed Media Class | Event in NA | B square crafts suppliers | Townscript
Did you get excited and want to start working with Sculptor Tex Contour Medium? Which we have launched recently. This medium is awesome and super fun to work with.Today we are sharing with u all an amazing and new concept in crafting. We are coming up with exclusive live classes which u can avail with Pre-registration with us. Now let me tell u all the benefits of these classes. These courses are going to be high end classes being made available to u all at very discounted rates, that's not all, we will be sending u the complete kit for the class so u don’t have to look here and there for the right elements . U will be joining our experts live and learning from them and if u have any doubts or queries they will also be cleared. Our coaching team will be available later also to solve any issues of surface if any. Secondly the live video will be accessible to u for a maximum period of 30 days ...just imagine for 30 days u can access it and finish your course in the comfort of your house and at the most feasible time for u .

Who can learn this course?
Definitely a creative person who can be a newbie, armature crafters, professionals, hobby crafters, craft tutors who wants to try your hands on this new Sculptor Tex medium

You will Learn..
*To make your own Back ground
*Wide knowledge about Choosing the right color, the right surface, the right fabric,
*Method to blend the fabric with the medium
 *Coloring the finished projects and
*many more tips and techniques.

So now here is our course details
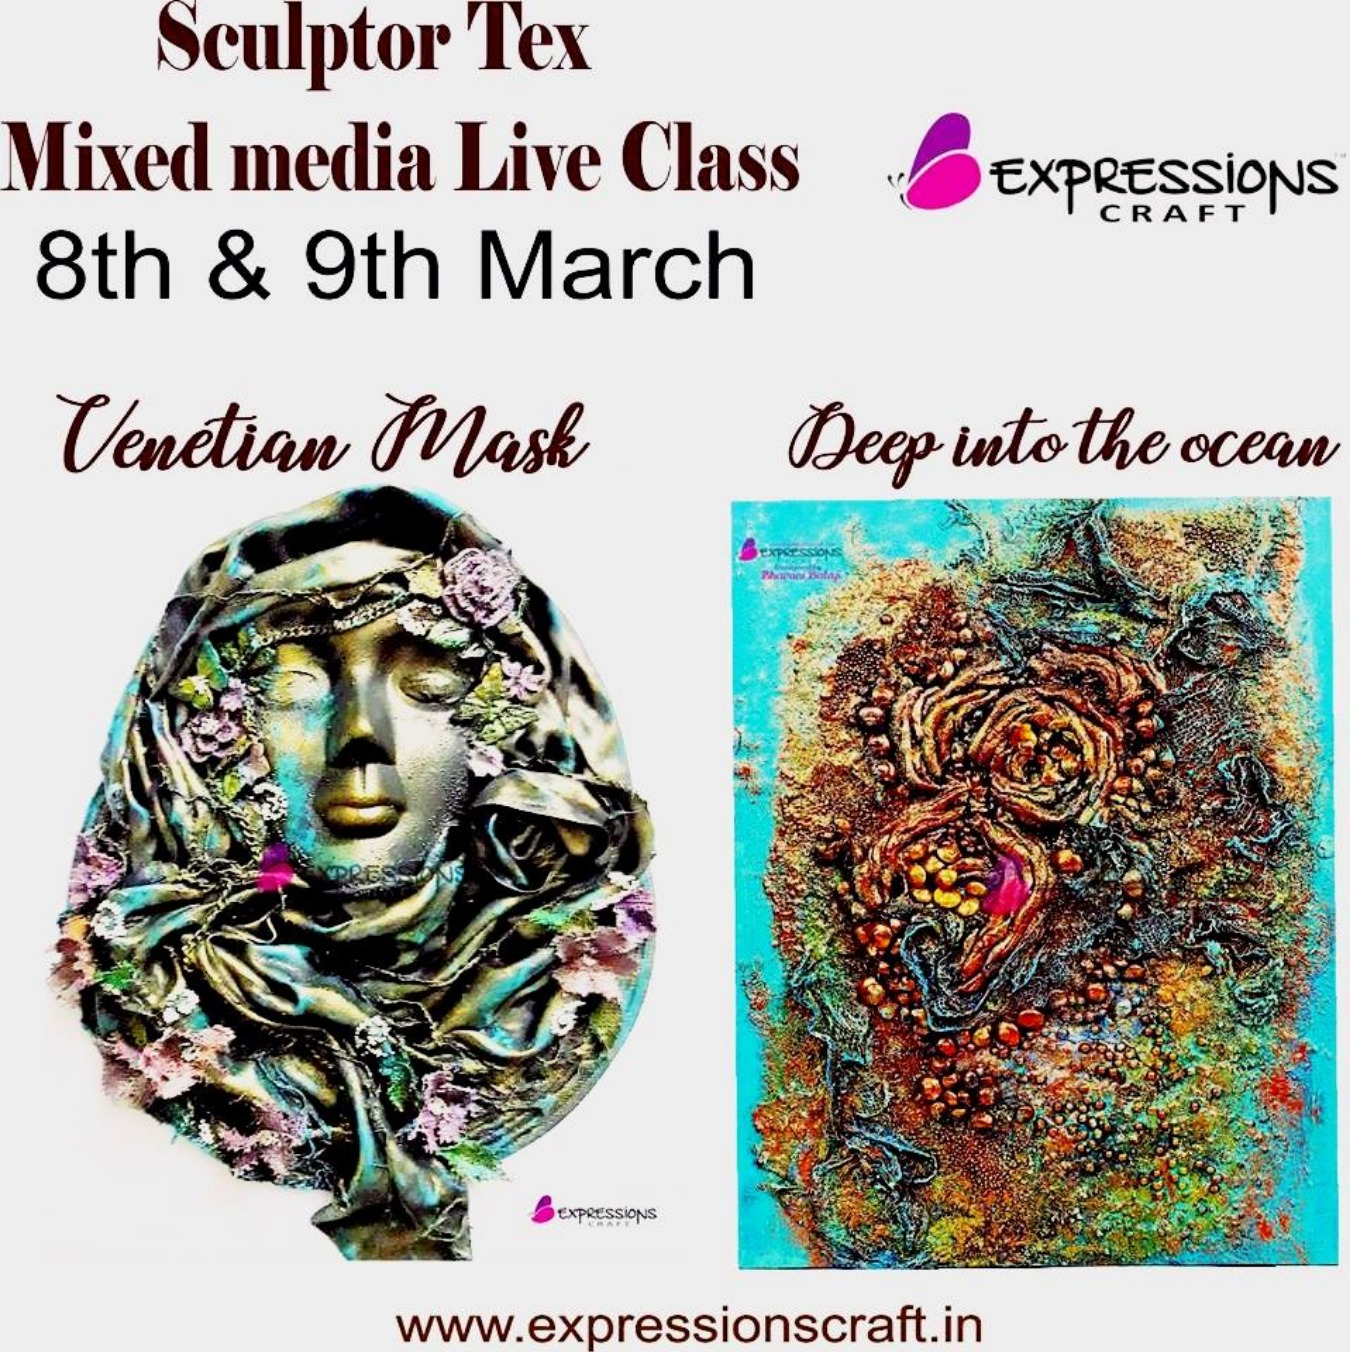
First course:
Name of the course:  Venetian Mask
Date:9th of March
Course Fee: 2000 INR (with materials)
Name of the Tutor: Priya Gajjar

Tickets can be booked on Here

Second Course:
Name of the course: Deep into the ocean
Date: 8th of March
Course Fee : 2000 INR (with materials)
Name of the Tutor: Bhavani Balaji

Tickets can be booked on Here

For more details please contact us @ expressionscraft@gmail.com

These are the two exciting course which you are going to learn this month. We have one more introductory offer also those who register for both the courses they are gonna avail 10% more discount. Isn’t that more interesting and excited We are planning for limited registrations only. so this will be an early bird opportunity.
Do join this amazing opportunity and learn how to create awesome projects with our team

To Buy combined projects

#EXPRESSIONSCRAFTLIVEVIDEOCLASS #PAIDLIVEVIDEO #SCULPTORTEXMIXEDMEDIAART #IMMIX #TIPANDTECHNIQUES

Altered Leather bag

Hello Crafters!!!

Myself Varsha, Today I am sharing my another pictorial project with you all.  I altered a  leather bag for my brother. I used lots of steampunks chipboard in my project. To create your own please follow the steps mentioned below:

Here is my project:


Supplies used


Step 1. Take a bag and apply black heavy gesso over it and let it dry naturally.


Step 2. I coloured base with 3-4 metallic paints & created background using stencil over the coloured base.


Step 3. Placement of chipboards and other embellishments , here I used Gel medium matte to stick all embellishments.


Step 4. I coloured my embellishments with metallic paints.


Step 5. I finished my project with black glitter.


Hope you like my project and create your own unique bag. 
Love & Hugs
Varsha


Monday 25 February 2019

Elegant image transfer


Hello  friends
 Sonika here , I am back with my new project. Which I made with expressions craft versatile new product 
Ie art essential gels these product  so easy to use and  everyone can use that.

Here my project pic


I made video tutorial for it 


Some tips using this technique

1---- printout should be always laser
2----- if you are taking colour printout make sure it should be little on dark side.
3--- this process second name have passions lol but seriously when you are rubbing paper you should take care doing that .
4----- last but not least  it's your wish what type fi nish u want on your project I want gloss look so I used that but you can use matt gel too.

Hope u guys like this tutorial and try making the same,....Do share your creations and feel free to connect if case of any queries…

Product list


See u soon crafty friends 
Till then
HAPPY CRAFTING!!!!!


Friday 22 February 2019

Looking through the Window - Mixed Media Shadow Box Ft. Immix New releases

Hello Crafty People 🙂

Manasa Priya here, back on Expressions Craft blog today with a step by step tutorial on how to quickly make a layout in easy steps.

Follow this post to see how I created this shadow box. The theme of the box is The eternal love birds Radha and Krishna looking through the window onto a beautiful garden.

So I randomly picked up all my Expressions Craft stash to get started.


So,  now I took the Immix texture paste and Expressions Craft Dot and stripes stencil and stenciled randomly to add texture to my shadow box.
Then,  I placed the negative chippies at the base ( mind you, never throw your chipboard backings as they can be used to create beautiful patterns) and checked for the placement before I secured it with the newly launched art medium.  It is light weight and good to stick light embellishments among many other uses.
Now I used Immix Gesso and primed the entire surface. Then I added the newly launched pearl beads in the color solver to add some texture.
It's time to add colors.  Splish splash the sprinkle mists.  I chose the color deep teal blue for the corners and butt orange for the center. Look at the vibrancy and pigmentation! 
I finished by coloring and adding chippies and embellished with some charms and the newly launched cabbage rose buds.
And now comes my favorite part,  adding the beautiful glitters.  Can't tell you how amazing these newly launched premium glitters are.  Alaskan gold is to die for ❤
And here is my finished shadow box.  I hope you enjoyed going through the tutorial.
Please let me know your thoughts in the comments below..
Until next time..  ❤

Thursday 21 February 2019

Mixed Media Canvas - Create Happiness Tutorial

Hello Friends,

Priya Mishra here, and I have a video tutorial for you all using new Gel Mediums from Expressions Craft. You can find all supplies link in my video description.

Here are some pictures of the project


You can watch the video here


You can participate in our challenge this month  here

Supplies Used:


Wednesday 20 February 2019

Be Inspired

February is the month of love...it is amazing how this month highlights our feelings towards the one whom we have come to love and share our life with....This month also saw the launch of Expression Crafts new products and by far my all time favorite has been Sculptex Contour Medium.I love to experiment and come out with something different...It's been a adventure for sure.


So moving on I decided to recycle some of old canvas .They already  had a coat of color so I took Immix white gesso and muted the color to give me an even tone... 

Immix White Gesso
Immix white gesso
The next step was to create a soft stencil effect on the canvas .I took Heavy dimensional gel and added a bit of glitter (Fairy dust)to it to highlight the design of the stencil.


 Immix Sculptor Tex contour medium.This is basically like a fabric hardener and can be used to sculpt fabrics to create interesting textures.This medium has four color tones totally to be used for ones purpose (Black,Brown,Grey,Clear) I chose clear for my project.To use this medium one definitely needs to wear gloves and the prep the table with plastic sheet .

I decided to use this fabric  pack which comes in three varieties (cheese cloth,cotton cloth and Burlap) available in Expression craft .This definitely made my job easy as I could see clearly that the fabrics were easy to use with this medium.I went with cotton cloth.

I started to cut the cloth in small bits and dipped them in the sculptex squeezing the excess and creating an interesting contour and let them sit for few minute till they were semi dry...Now I concentrated the area of interest with crackle based heart.I wanted to create a composition around it so I started layering the semi-dry fabrics around the heart.


Once I arranged it I felt that the fabrics created a heightened texture .This added more depth
 to my area of interest.
I wanted to create more textures and I added the deco stones with texture paste.Then took Immix Metallic new release paints Unicorn pink and Purple Affair.As the color palette had been set for this month I went with these two colors which gave me a shimmer of the Pinks...I kept washing down the color as the entire project rested on watercolor effects.I also embellished the heart with star fish for added effects. 
After playing a while I decided to bring more interest to the sculpted fabric by adding Immix Holiday gold.The gold highlighted the pinks underneath.I wanted to bring in a very simple composition for this very fact that the artist in us should not fear to explore and experiment.Understanding a medium and its effects is a lifelong work but never postpone it because of Fear.Happy crafting and always be inspired to try something new.. 

Products used

Immix Fabric Pack

Tuesday 19 February 2019

Mixed media shadow box with Metallic paints

Hello Everyone,

I am shylaa here today with an inspiration on mixed media shadow box using metallic paints

I have used our Art Gel medium in this project for adhering all the elements to the shadow box which is made paper. 

Supplies list
- Two shadow box - 6x6 & 3x3
- Steampunk MDF cutouts
-  Cheese cloth
- Mosses
- Message bottle
- Sequins
- Glue

Here are the steps in brief.

Fix the 3x3 shadow frame inside the 6x6 shadow box with glue
Adhere the cheese cloth with gel medium and allow it to dry
Apply a coat of gesso it
Add the steampunk MDF over the corner and art deco stones with glue.
Apply a coat of gesso over the entire shadow box
Add colours with IMMIX metallic paint.- pink & mermaid song
To the centre of the shadow box add layers with mosses.
Adhere the butterfly wing chipboard to the center and add the message bottle over it
Now dry brush the shadow box with a mix of raw umber metallic paint
Sprinkle some glitters & sequins over it

Close ups


You could win these beautiful products by joining in our monthly challenge
Current Challenge
Click here to enter

Happy crafting

Shylaashree