Showing posts with label photoframe. Show all posts

Thursday, 22 August 2019

Photo Tutorial- 'DIY- Altered Photo Frame'

Hello everyone!!
Ruchi here from Ruchi's Crafeteria and sharing my DT project with all of you. Today I've altered a photo frame in shabby chic colors.
This post gonna be helpful for you to up-cycle your old or boring photo frame into a beautiful piece of art :)
Have a look...


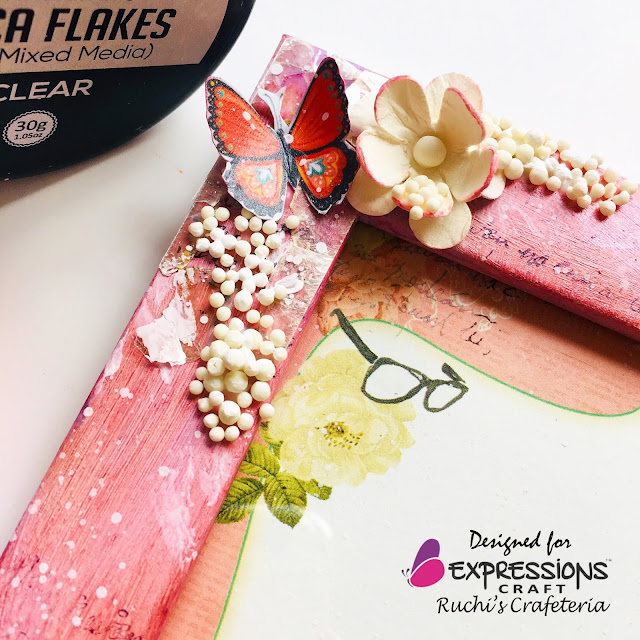
First i picked a photo frame and removed its glass and back frame. Then applied double coat of White Gesso and some places applied Crackle Texture Paste to give some crackled look.


Once it dried, sprinkled newly launch Chroma Burst pigment powders- Coral Reef & Galaxy Purple along with water.


Applied Blossom Blush metallic paint on frame and chipboard, which is newly added to the shade card of immix wide range of metallic paints.
Chose some flowers too for decorating my frame.


Lastly added some Deco Stone- Mini & Micro and newly launched Mica Clear Flakes. Used Matte Gel Medium for adhering them.


Stamped here n there to give interest to my frame and just added a piece of pattern paper inside the frame to match the new look of it. 
Splattered some White Gesso for completing the look.


Supplies used
Chroma Burst


That's it for today. Hope you like my today's project. 
See you all next time with more inspirations. 
Happy Crafting!!
Ruchi

Thursday, 23 August 2018

Fairy frame with chalk paint

Hello Crafty Friends,

Sonika here today and I'm back with my inspiration project for this month's ongoing challenge CHALKPAINT

I used Expression Craft chalk paint, These are matt acrylic colors and can be used on various surfaces where we want a matt look. Recently they are getting much attention and Expressions Craft has launched a vibrant range of colors in this segment.

Here my project


Steps involved
1. To start I coated the  frame with White Gesso. 


2.Stenciled with Expressions Craft MANDALA Stencil and modelling paste.Then dried with heat gun.

3.Then coated the frame with flamingo punch, champegne linen and some dry brushing with dusty lavenderchalk paint. 
4. I have use papericious fairy collection and fussy cut to fairies and coloured with chalk paint
5. Then stick the fairies on frame with help of 3d foam tape and 
layered the frame with handmade flowers, moss,sisal. Embellished further by adding leaves, doily . To give more shiny look i applied wink of stella clear gliter on it.

Some close up pic of this frame


I used these product in frame


Hope I  am able to inspire u ,waiting for your creation with chalk paint 
 Thank u for stopping with us
 See u soon ❤️❤️❤️❤️

Saturday, 28 July 2018

Decoupage Techniques

Hello crafty friends!!!

Alpna here. I am back with three decoupage projects for Expressions craft.

Today I going to share 3 projects with you all. I made these projects using decoupage papers from Expressions Craft. These papers are so beautiful and versatile that you can use in multiple projects. I made one album using turquoise card stock and floral decoupage paper, one photo frame and one tray.  Here are my projects:


I made a video tutorial for the process of decoupage technique. Here is the video:


You can buy these awesome products from the given below links:


Thank You,

Looking forward to see you with your creation on our current month challenge

Hugs,

Alpna

Wednesday, 11 July 2018

Shabby chick frame

Hi crafty friends,


I am Sabiha Khan again on Expressions craft blog with some more inspirations for July months challenge on our blog. The challenge is to use "stencil" in your project.

Guys get inspired and make some beautiful projects and participate
HERE

Today I have come up with a beautiful frame where I have used "IMMIX"  Sprinkle mist and art stones from Expressions craft and leafy chipboard's - birds and branches and  Decorative sentiment chippies from Expressions craft too. All the products are just awesome and give superb results.I couldn't wait long to use these. I am sure you all will love these too.

Lets begin with some pics of my project first so u get inspired too...


 First I took a photo frame and removed its glass. Coloured it with black gesso. After the gesso dried applied little wax here and there so that I could give it a shabby chick look later. Then next I applied white chalk paint all over the frame. After the paint dried scratched little paint from the places where I had applied wax. A perfect shabby and little vintage look is achieved.

Next on the inner part of the frame I have used a pattern paper which I have stencilled with texture paste.I have also applied some texture paste using stencil on the frame too. I have applied "IMMIX" Sprinkle mist Fuchsia pink, Citrus yellow and Titanium white to give some colour and texture to the paper.

Next took the Heartfelt Wishes chippie sentiment and painted it using the sprinkle mist only. These mist colour are so versatile you can use it in many different ways. Applied glossy ascent over the sentiment to give it a finished look.

Adhered the prepared paper on the inside of the frame with the sentiment in the middle.

Next took the"IMMIX" Mini Art stones in a bowl and sprayed sprinkle mist over them and mixed them properly to colour all the stone. U can see how beautiful these coloured stones look. You can use them as it is or colour them with different mists too.

Took few hand made paper roses and flowers and coloured them using same Sprinkle mist. Just to give them a soothing colour effect, I mixed yellow and pink colours on my craft sheet and dabbed the flowers on the paint to get these results.Same way coloured the leaf chippies too.

I have used few fabric and form flowers too. Coloured them with spraying colour on them. 

Finally when all the flowers were dry, adhered them on the frame and applied some gel medium to adhere my art stones.

I have also used few die cut leaves and butterflies to make my frame more beautiful.

Hope u guys like this Shabby chick look of the floral frame.

Few more close ups...


Hope I inspired you guys......
Looking forward to see your stenciled creations soon...

Love


Tuesday, 5 June 2018

Photo Frame Decoration

Hello, Friends

Dheepika here and I'm back with Photo Frame Decoration.


A step at a time:
  • Place the stencil on the frame and apply texture paste (texture paste + blue color) on it.
  • Add the handmade flowers (check the tutorial for the flower making below) and some leafs at the frame corners.
  • Add the chipboard to the left side.
  • Place the alphabet die cut "FRIENDS FOREVER".
  • Now the photo frame is ready.
Video Tutorial:


Here are a few photographs of the project including close ups


Supplies list:

Geometric Texture


Lemon Yellow Card Stock                     Plum Red Card Stock


Parrot Green Card Stock                           Saffron Card Stock


Over to our challenge theme this month it is Anything Goes

Link your projects here.

Pls follow the guidelines before you play along with us. 

Thank you for visiting our blog again,
Don't forget to be awesome!
Dheepika vasudhevan.