Showing posts with label chipboard sentiment. Show all posts

Thursday, 19 December 2019

Mixed Media Canvas "Believe"

Hello Everyone,
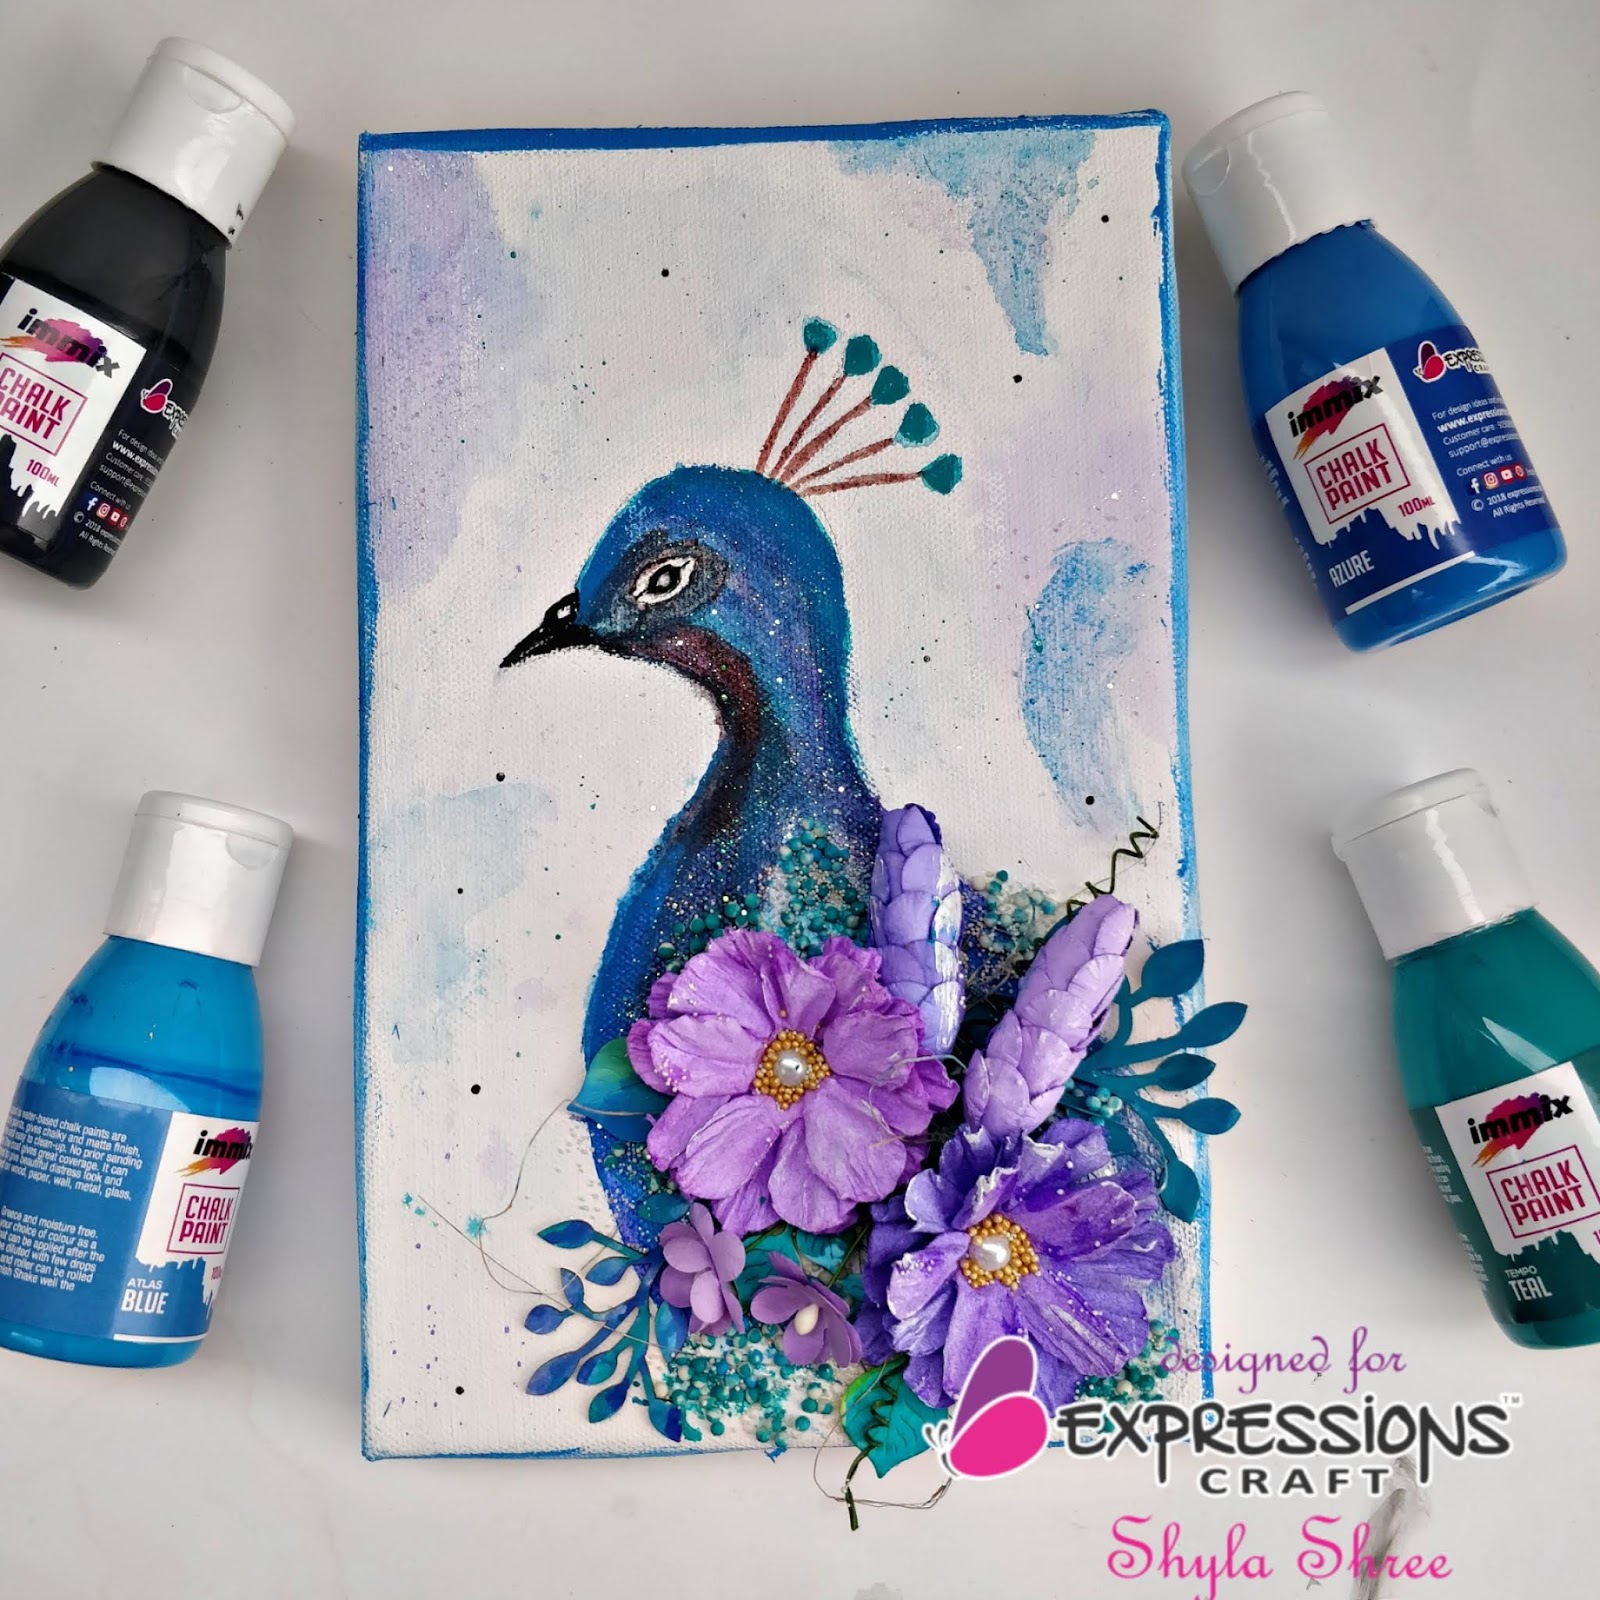
This is DT Archana here,  Am back with another Mixed media canvas using Expressions Craft newly launched decorative chipboards.. here are pictures of my project


Supplies Used:
Stretched Canvas
Immix ground texture paste "Black Granite"
Immix Crackle Texture Paste
Cheese Cloth
Immix sprinkle mist "Chimney Smoke"
Immix White gesso
Clay Embellisment
Expressions Craft Chipboard Embellishment "Fancy Swirls", "Blossomy Frame"


Watch its making Process here:


That's it from my end today, Hope you guys have enjoyed this process,do participate in our ongoing challenge and get a chance to win exciting goodie bag from us, All the supplies available at Expressions craft
I will be back till then bye-bye, Take care and Happy Crafting

Love
Archana Sehgal 

To buy our products check the following stores
Crafters Corner
Deepa Anandakrishnan
Hindustan Trading Company - Fine Art & Stationery Since 1974


Monday, 25 November 2019

WINTERY DREAMS- INSPIRATIONAL POST


Hi friends, 
Today its Inspirational monday !!so am back with my project for our Current Month Challenge. In this i have used the newly released chipboards and created this winter scene.I have also made some embellishments such as flowers and leaves using chroma burst and decorated the panel.Take a look at these snaps of my works.


All supplies are available at our website

you can also buy our products from below vendors
connect 4 sale
Hindustan trading company- Fine arts & stationery since 1974

Do participate in our ongoing monthly Challenge
https://expressionscraft.blogspot.com/2019/11/challenge-15-winter-celebrations_2.html


Hope you have enjoyed today's tutorial.
Happy Crafting!!
Regards,
Shwetha Mahadevan


Friday, 5 April 2019

Mixed Media Canvas

Hello friends,
This is Shalini Kundrai ,sharing with you all my first project as a design team member. Recently i shifted to my new studio so thought of making something for it using very vast craft products of Expressions Craft. Initially i thought of using only one particular product but one can't resist when you had received amazing products in your DT kit i just wanted to try n test everything. So i finally decided to make  a mix media Canvas.


 Checkout the following step by step process pics with details

1. Actually i wanted some blue to coordinate with my T light holders so firstly i took a picture which i was hoarding for so long n some pattern papers to match the flowers i received in my DT kit ..So here is 15*15 inches canvas with pics n pattern paper cuttings 


2. i thought of using waste corrugated sheet to give some textures.


3. So here are all the products that i had used in this project


4. A rough layout of what was in my mind


5. After the rough layout i gave textures on the edges  n sides of canvas using texture paste n stencil 


6. i decided to add few more elements to make it more appealing so i used few laser cutouts n resin embellishments


7. i decided to add textures on these cutouts also

  
here i used Chippy n handmade flowers to complete the look which was on my mind...n these beautiful flowers are  the reason i chose pattern papers which i used on sides. this leafs branch chippy beautifully coordinating my bhudha pic.


8. After the texture got dried i applied 2 coats of  heavy black gesso on edges n sides of canvas as well as corrugated sheet followed with dry brushing with Chalk paint Azure n Metallic paint Holiday Gold


9. To give exactly the same shade of green flower i used grassy field chalk paint with little black gesso to paint grape wine leaves branch chipboard . Finally i pasted all the pattern papers, corrugated sheet , Bhudha pic , flowers , chippy n laser cutouts using  Art mediums Acrylic matte n gloss .Lastly i decided to change laser cutout from Believe to Life is Good...here is the final look from side n front


Thank you so much for stopping by n I hope u enjoyed this process tutorial.


Friday, 28 December 2018

Peacock painting tutorial with chalk paints

Hello crafty Friends

I am Shylaa here to share with you on a easy step by step peacock painting with a mixed media touch on a canvas with chalk paints.

We are at the verge of bidding good bye to 2018 and very excited to welcome the fully loaded 2019!!!

Why can't we start something new!!!

Here is my first trail on canvas painting with chalk paints but turned out beautifully with our IMMIX range of products


Here is my video tutorial for the mixed media canvas with peacock


Thursday, 27 December 2018

Mixed media oval frame with angel by Goga Crafts

Hi there!

Today I would like to show you my newest inspiration for Expressions Craft using our new brand products: metallics paints and new colors of chalk paints.

Today I have for you simple mixed media oval frame with angel and blue handmade flowers.

How I did it? 
Whole MDF base I covered by heavy white gesso and dried it up. 
Then I've create my own mixed media paste using texture paste and two shades of our new chalk paints: Smoky Black and Desert Grape so I received so much lighter colors and used them with our stencils: vintage  


VIDEO:


USED PRODUCTS:


Thursday, 29 November 2018

Love is in the air Ft.Mixed media Heart

Hello Crafters!!!

I am here with a my new bright and beautiful representation of love and affection towards the special ones. Through this project I want to show you how bright and colorful can love be, also how love can be celebrated in any fashion. Love is always around us, its only that we have to find it and recognize it. Wings around the heart emphasizes over the concept of 'love can fly'. So this winter celebrate love with Christmas.

Here is my project:


Gears and wings, and my new love- Immix Metallic paints - Raw umber, Mari Gold and Jingle shells

Below is the Step by Step pictorial of the project.

Step 1: Take two MDF heart bases of different sizes from Expressions Craft and layer it with white texture paste.


Step 2: Apply crackle paste over both layered MDF heart bases and let it dry naturally.


Step 3: Color both bases with Pink punch Chalk paint.


Step 4: To make the chalk paint shine I used metallic coral pearl paint over bigger base.


Step 5: I shaded the edges of bigger base with metallic Browney Rust paint.


Step 6: Created the texture over both bases using stencil and texture paste.


Step 7: Take two big wings chipboards and color them with Red Cherry Wood chalk paint and shade them with Pale Sunset Gold chalk paint.


Step 8: After drying out of  the texture I sprayed Sprinkle mist Citrus Yellow over both bases and wings.


Step 9: I also sprayed Sprinkle mist Persimmon over the smaller base.


Step 10: I took steampunk chipboard and colored them with Pale sunset Gold  and Military Brown Chalk Paint.


Step 11: I sprayed Sprinkle mist chest nut over both base.


Step 12: I colored metal charms with Metallic paints Raw umber and Mari Gold.


Step 13: Place all the elements like Resin, Immix chipboards, Metal charms over smaller base.


Step 14: I finished the project by coloring the elements with Metallic paint Jingle shells to highlight them in the project.


Here is my project images:


Closer look:


I hope our like our new released and inspired you to create something from the same. 

Supplies Used: 


Thanks for visit our blog and don't forget to enter in our challenge.