Showing posts with label checks and cubes stencil. Show all posts

Tuesday, 28 July 2020

Altered Record with Chroma Burst


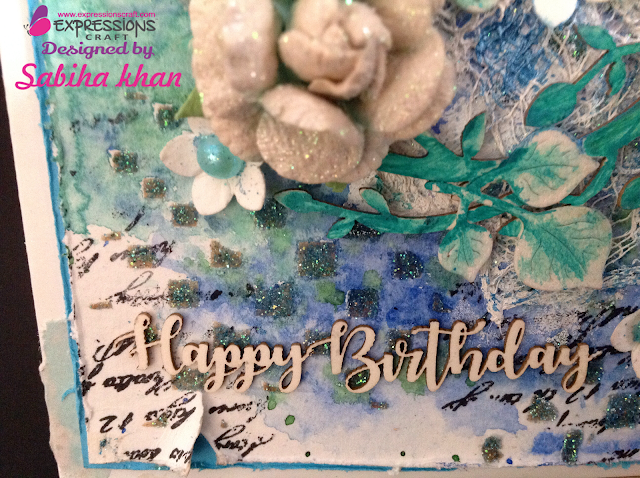
Hi dear crafters, for today I altered an old vinyl record, using all kinds of Craft Expressions goodies.


Products used:
 https://www.expressionscraft.in/product/ornamental-filigree-background/
 https://www.expressionscraft.in/product/texture-paste/
https://www.expressionscraft.in/product/art-gel-medium-matte-2/
 https://www.expressionscraft.in/product/dimensional-heavy-gel/
 https://www.expressionscraft.in/?s=clear+gesso&page=search&post_type=product
https://www.expressionscraft.in/product-category/chroma-burst/
https://www.expressionscraft.in/product-category/metallic-paint/ 
https://www.expressionscraft.in/product/birthday-celebrations-stencils/

Hope I gave you some ideas to work with Expressions Craft Products.
Love Anja xxx 

Wednesday, 1 August 2018

GDT post Cards with shaker chippies

Hello Crafters,

Today we have our GDT Heena here,

Hi everyone, Heena here from bloomingpaperbuds.com.

 I'm back here with my last post as guest designer for the Expressions studios blog. I had so much fun creating with these amazing products, the Deco stones have become my favourite and I love the quality of the chippis. 

Today I have two cards to share that I made using the Shaker chippies and other art mediums from Immix.
So let's get on to it..


For this card, I have used the Designer Scallop Oval frame and Shaker Oval chippies.
I have also used the Deco stones and Sprinkle mists in shade - Titanium white and Fuchsia Pink.
I have used the mini deco stones along with some sequins and seed beads for the shaker.


For this card, I have used the Designer Square frame and Shaker Heart, Stars Dangler chippies.
Also used the Deco stones and Sprinkle mist in shade Fuchsia Pink.


Supplies Used

Titanium White Sprinkle Mist                   Fuchsia Sprinkle mist           


Designer square frame                        Designer Oval frame


 I hope you liked my cards, Thank you for stopping by!

Heena

Wednesday, 25 July 2018

Interactive cards using Stencils

Hi dear crafty friends,

Hope u all are doing fine. 

Happy Wednesday to all. I am Sabiha khan here with few interactive cards using stencils from Expressions craft.
Guys, get inspired and take part in our ongoing challenge for July month "STENCIL IT" HERE

First have a look at all the three cards...

U can see the stencils by expressions craft give such good results with all different styles and mediums


Here I have used three different interactive techniques with three different stencils in my cards.

Lets begin with the first card "happy birthday" card.


I have used Checkers and Cubes stencil to make the background with three different distress inks.I would like to mention that I have used Expressions craft ink blending tool in all my cards. It is very good quality and easy to use with beautiful results too.
My card is a slider pop up card. The middle panel of the card slides up to show the message inside as u can see in the picture above.
The bear image and sentiment are from Happy bear stamp set from Expressions craft.

My second card is an Easel card "Just for you"


For this card, I have used Sunflower Stencil for the background.
First I applied texture white on a watercolour card stock with the help of stencil. before the texture dried sprinkled some blue fine shimmer on the texture.After it dried applied some distress oxides on the above corners and embellished my card with some hand made flowers(using expressions craft blue card stock)and die cut leaves.
Embellished the inner card with some stone lace and a sentiment from "Wild flower" stamp set.

My third card is a "Best wishes" shaker card


For this card I have used Vintage style stencil. I have created a rainbow background with distress oxide inks and ink blended them with Expressions craft ink blending tool.
In this card I have used Mini Art Stones from expressions craft too.
I coloured few stones using Burnt Orange Sprinkle mists. Used them with uncoloured stones after drying as my shaker material.
Don't u feel that these art stones are great for any shaker card. u an colour them with different colours too.

Hope u guys enjoyed my post.

Checkers and Cubes stencil


Sunflower Stencil


Vintage Style


Happy bear stamp set


Ink Blending tool


Take out your stencils and create something, don't forget to link your work on our blog for this months challenge.

Love...


Friday, 4 May 2018

Mixed Media Birthday card

Hello crafty friends,


Sabiha khan here with my video tutorial on mixed media card.


As its too too hot weather in India. I hope you all love to be indoors. And what can be more better than making beautiful project with your crafty skills.


I have come up with a beautiful Birthday card  with a video tutorial too, using Expressions craft CHIPPIES, CHECKERS AND CUBES STENCIL and BLUE CARD STOCK. 


Lets first have a look at my project....


As You must have seen in my card that I have used beautiful Leafy wreath chippie and a Happy birthday sentiment chippie on the card.

Now few steps to make this beautiful mixed media card.

* First I took a side folding card base. A slightly smaller Blue card stock from Expressions craft and a slightly smaller watercolour card stock.

*Distressed the edges of blue and watercolour card stock with scissors and kept the blue card stock aside.

*After I was satisfied with the colours ,I took a cheese cloth, applied texture white on it and adhered it on the middle of the card.

*I took the leafy wreath chippie and placed it on the cheesecloth on the middle of the card.Coloured it with green paint to enhance its beauty.

*I have used some ready flowers and die cut leaves to decorate the card.

*I also made few small flowers using flower punch and applied a small half cut pearl in the middle of the flowers.

*Lastly took a sentiment chippie from the chippie set and adhered it on the bottom of the card.


I have tried my best to explain the procedure but the video is cherry on the top. All the steps would be more clear in my video.


Guys have a look at the video and don't forget to share your feedback in the comments below.


Hope you enjoyed reading my post.


You can make similar cards for different occasions as the chippies set comes with so many different useful sentiments.


Chick on the video below to see the full tutorial....


Hope to see more such project from you all.


Cardstock

 Good bye


                                Love