
Hello, Friends
Dheepika here and I'm back with floral cards today.
I have used cardstocks, stamps and stencils for today's project.

I have used cardstocks, stamps and stencils for today's project.

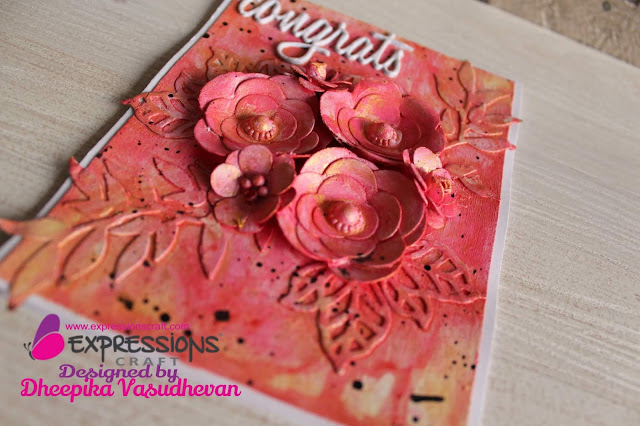
Card 1 - Congrats

Video tutorial:-
A step at a time:
- Take a cardstock apply gesso on it and dry with the help of heat tool.
- Once the handmade flowers ( used Expressions cardstock) are done apply gesso on them and let it dry.
- Arrange the flowers on the cardstock.
- Started spraying colors on the card and until I'm happy I added colors on it. Dry the colors.
- Spray some golden shimmer on it and add some metallic colors.
- Splatter some black color on it.
- Add the sentiment congrats on the left top.
- Now the mix media floral card is ready.
Here are a few photographs of the project including close ups


Card 2 - Best Wishes

Flower making tutorial:-

Flower making tutorial:-
A step at a time:
- Stareted with die cutting the flowers and leaves.
- Once the flowers are made.
- Add the black cardstock to the base card.
- Then arrange the handmade flowers and leaves on the cardstock. Add foam to the flowers and attach them to the cardstock.
- Stamp the sentiment and add it on the card with foam tape at the backside.
- Now the card is ready.
Here are a few photographs of the project including close ups


Card 3 - Just For You


A step at a time:
- Started stamping the flower on a white cardstock and colour the flowers.
- Die cut a circle, place the stencil and apply gesso on it.
- Added sand on the stenciled area and sprayed color on it.
- Again die cut in oval shape on the circle die cut to create some space to insert all the flowers.
- On the the card base splatter some black color and paste the circle die cut with foam tape at back side.
- Now the card is ready.
Here are a few photographs of the project including close ups


Parrot Green Card Stock

Turquoise Blue Card Stock

Black Card Stock

Brickwall


Thank you for visiting our blog again,
Don't forget to be awesome!
You have become unstoppable dheepika
ReplyDelete😊
ReplyDelete